Fauxton 3D 2.0.0!! Faster, Easier, and Simpler!
Oh boy has ALOT changed!!!
Fauxton 3D 2.0.0 is here! Faster and easier than EVER!! Included in the new files are full documentation of all the new functions as well as a tutorial on how to set up some basic stuff! The newest version also no longer uses the FOV camera and instead has a standard Orthographic camera! :D
Here is a quick run down from the documentation:
Getting Started
Getting started with Fauxton is easier than ever! With the new Render Pipeline integration, you no longer have to make sure you are parenting models and billboards or even drawing models at all! The engine will take care of the rest for you so you can get back to making games!
Getting started takes only a matter of SECONDS! All you need to do is add the function FAUXTON_START() or an instance of RenderPipeline to your room or at the beginning of your game! After that just add in an instance of Camera and begin using the modeling functions! It’s that easy! :D
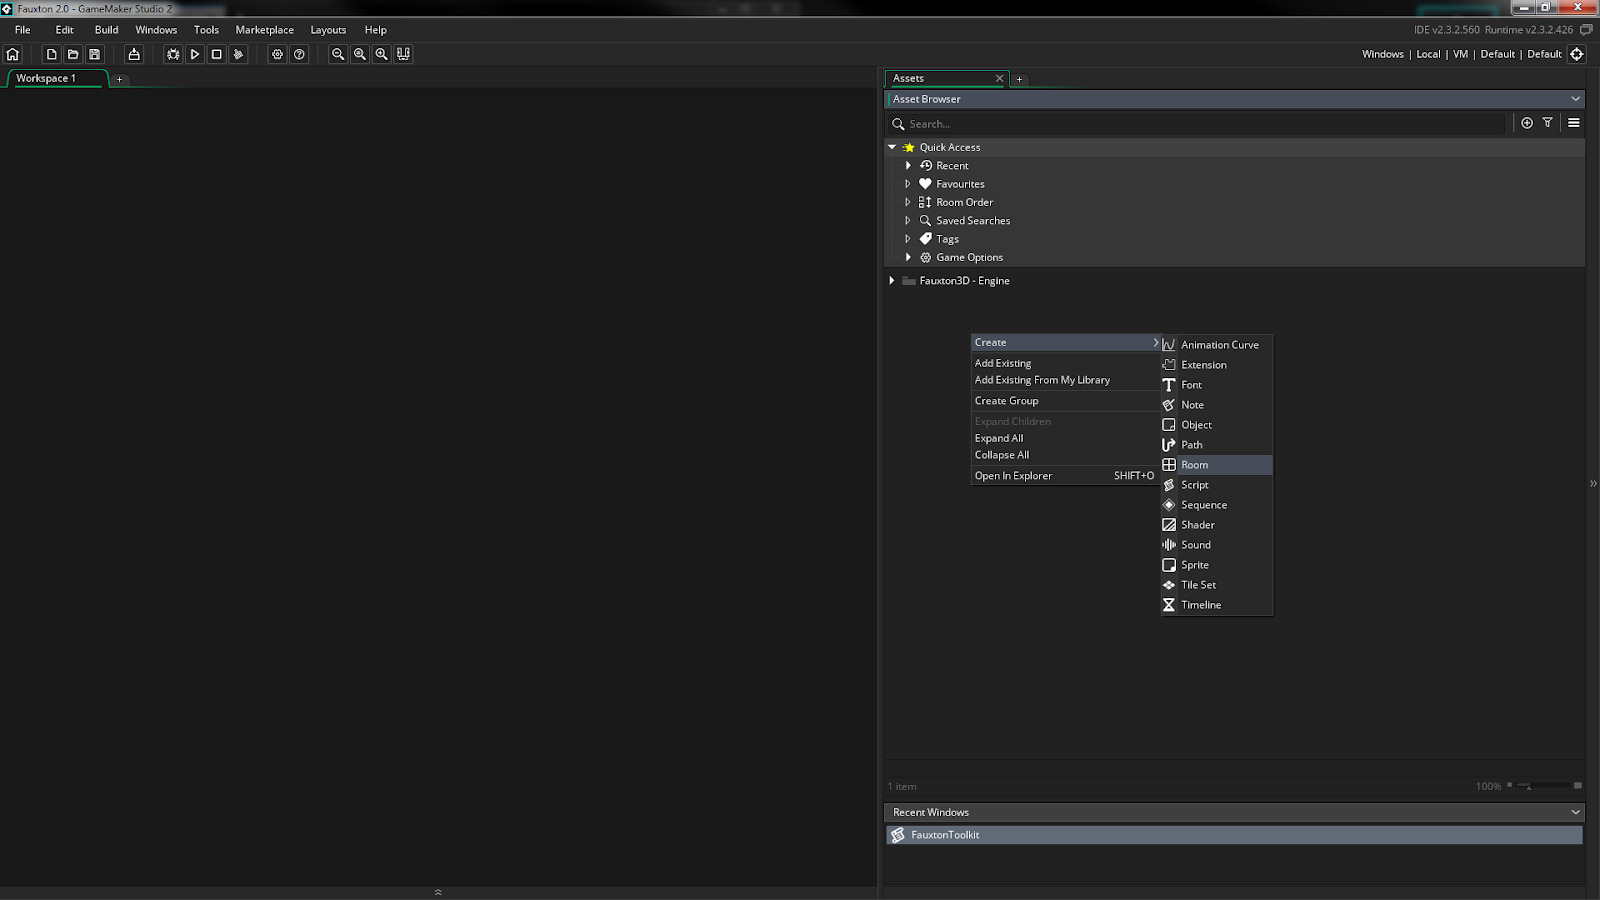
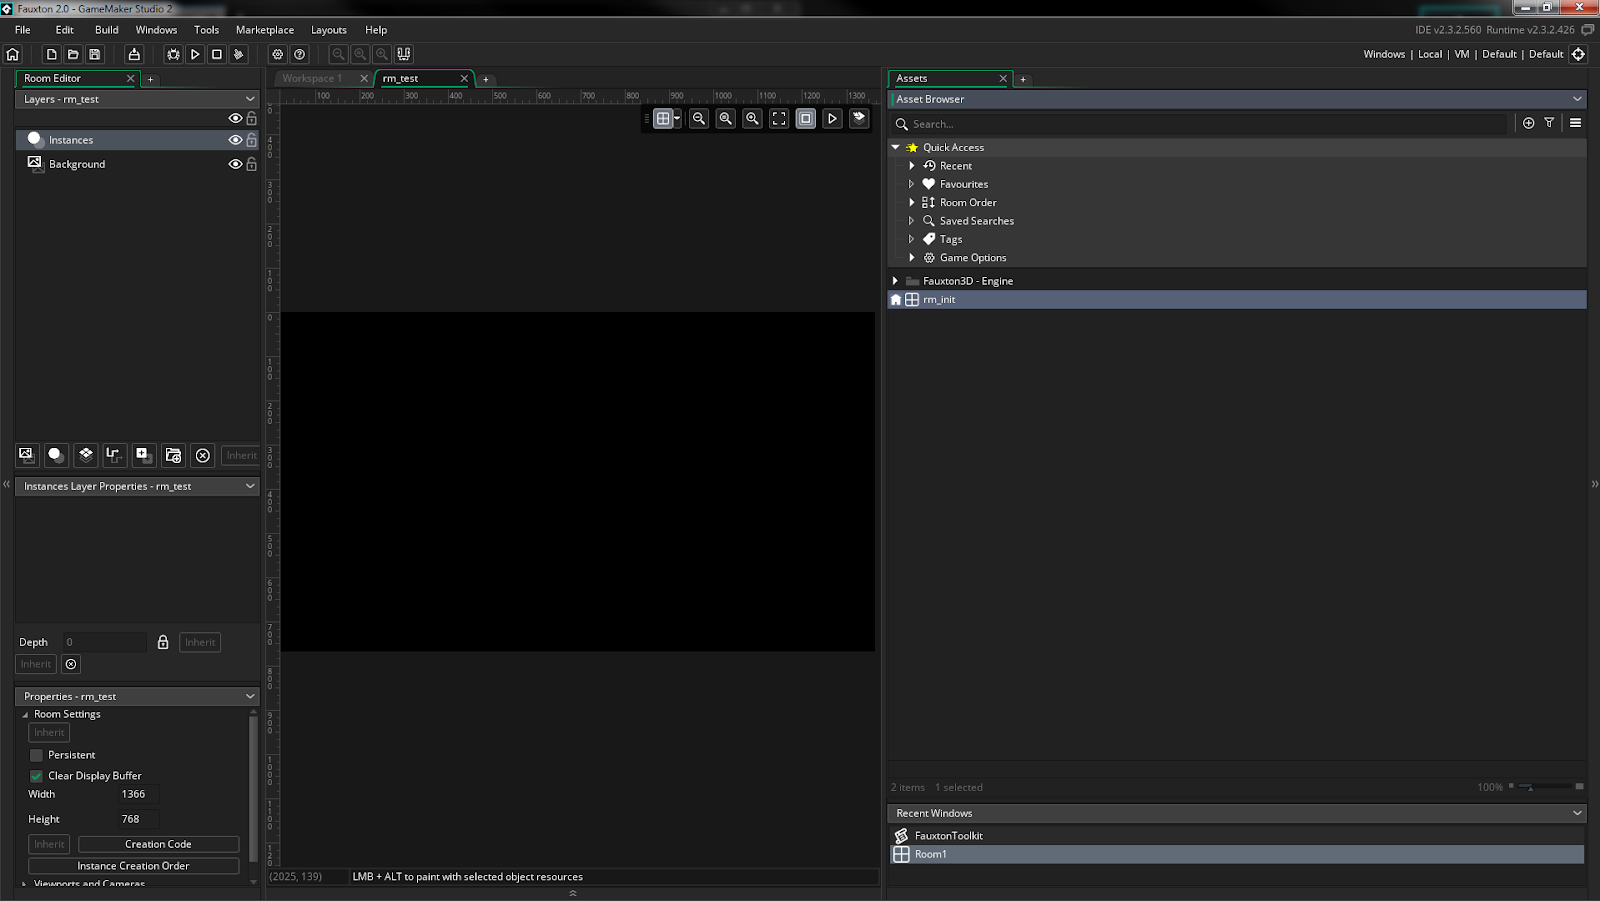
As an example, let’s start by first creating a room (Fig 1.a) called rm_init (Fig1.b):
Initializing the engine
Fig 1.a
Next, create a new background layer called “BackFloor” and set a sprite to it (any sprite will do, this is just for testing! )
Fig 2.a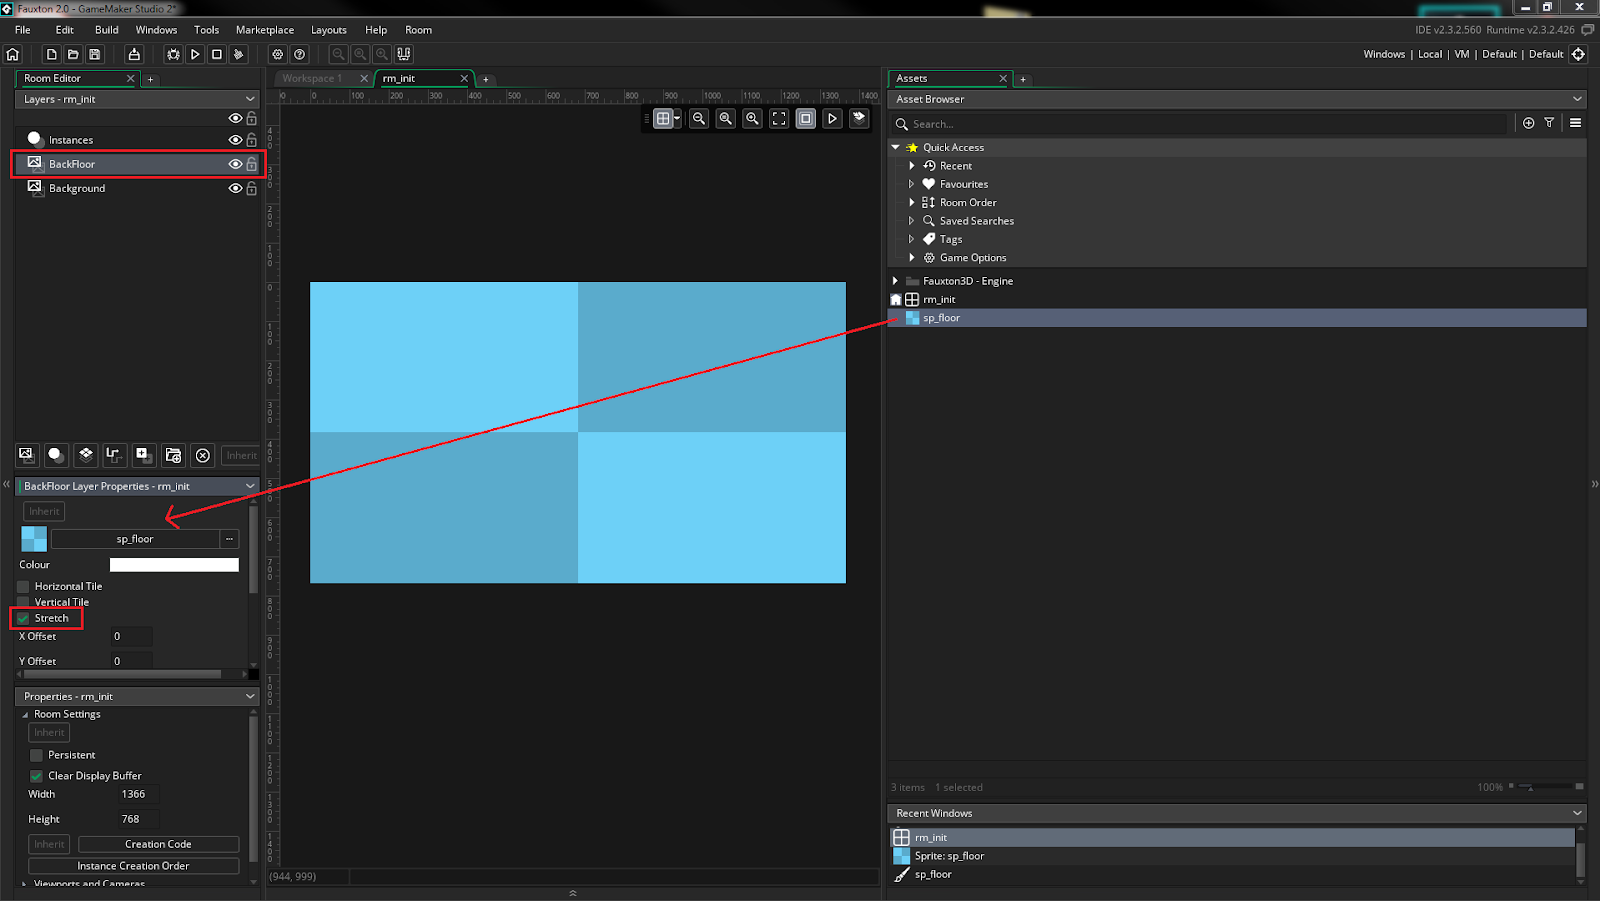
Next, we need to add the function FAUXTON_START() in the room creation code (fig 3)
Fig 3.

Setting up the camera
Now, go ahead and add an instance of Camera to the scene found in Fauxton3D - Engine > User Utilities > Nodes > Camera

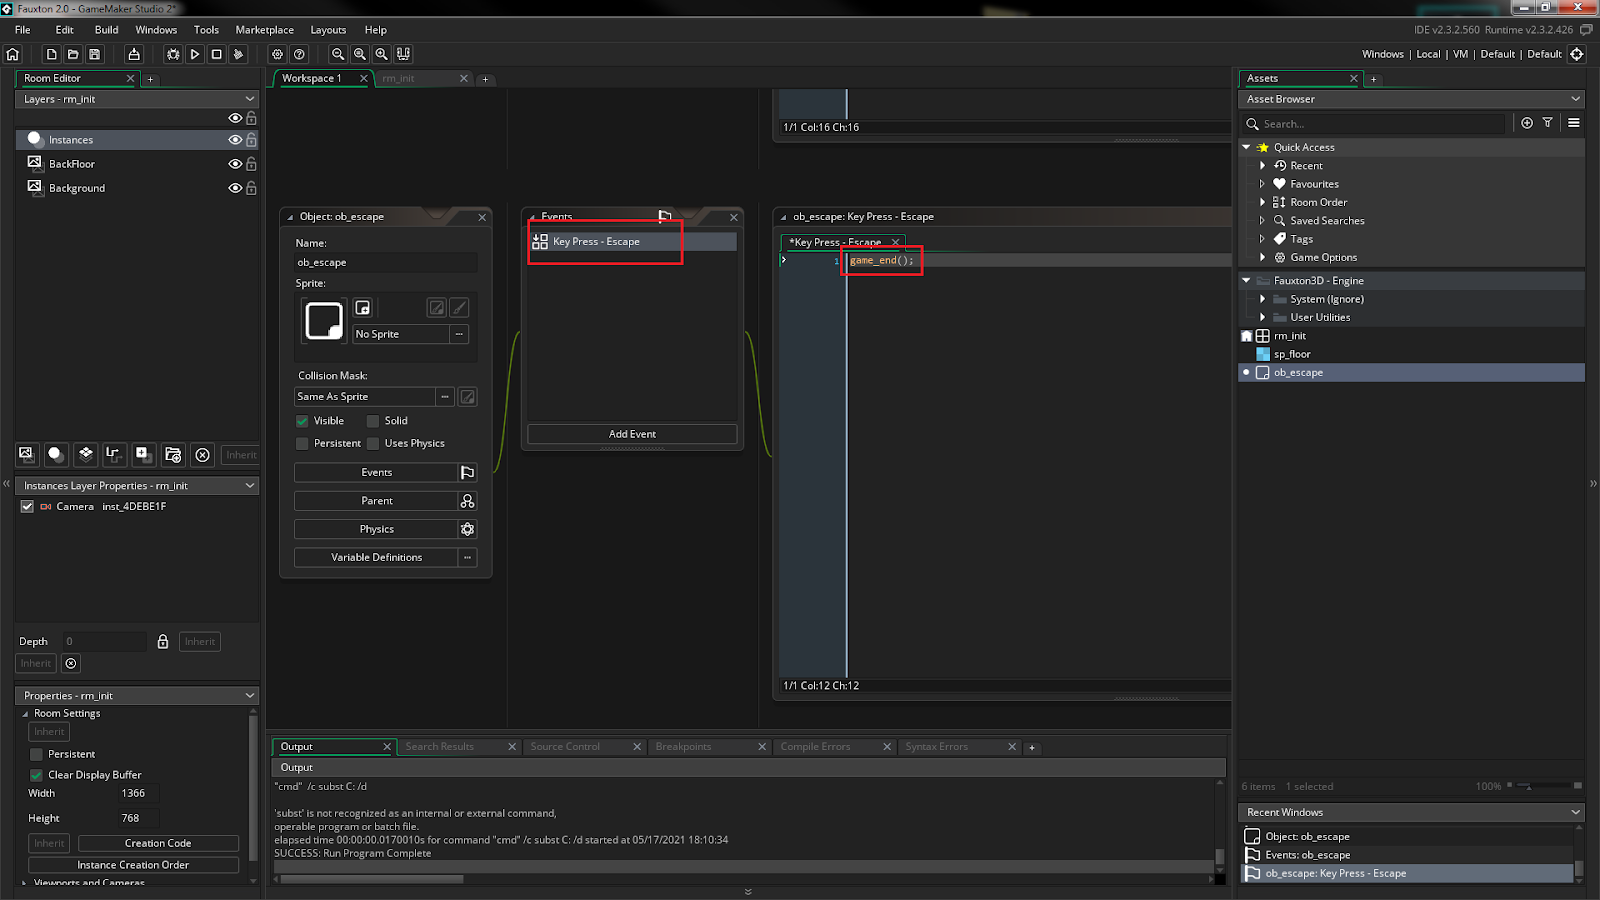
If you run the game you won’t be able to see much going on. That is because by default the cameras ‘MouseLock’ variable is set to false. If you have a gamepad you can try turning the ‘right stick’ and you should see some movement. To test that the camera is working and looking right, let’s create an object and add a ‘Key-Pressed Escape’ event so that we can end the game (since our mouse will be locked we won’t be able to click the X button on the window).
Fig 5.
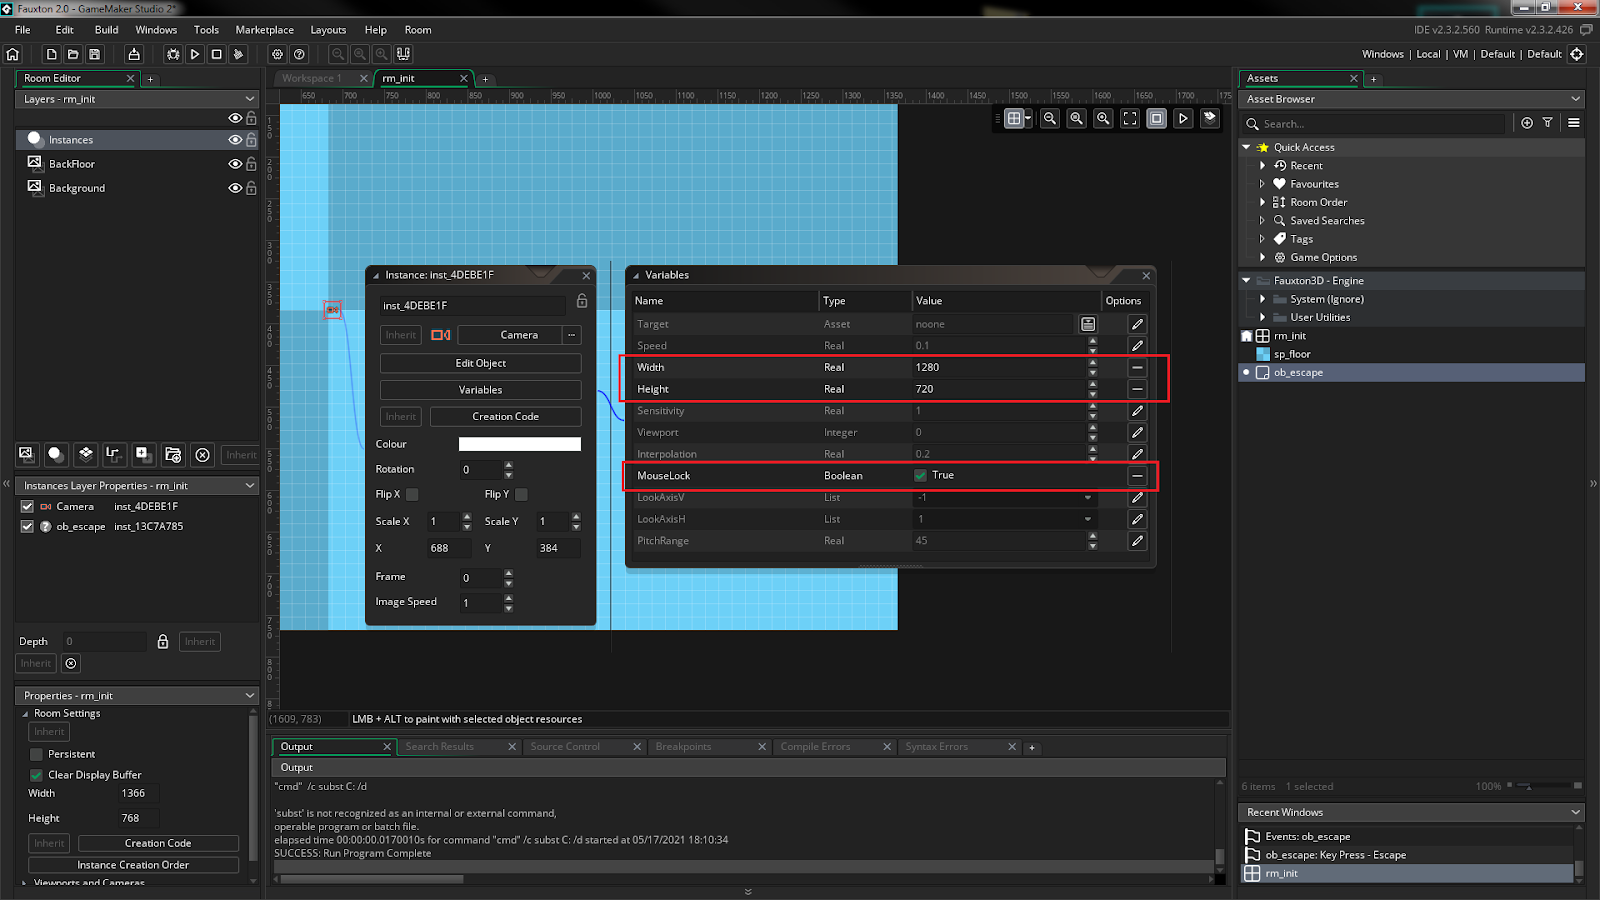
Now that we can escape our game, we can enable mouse locking as well as altering some other camera values. If you double click the instance of Camera and then click the Variables tab you will see a couple of options:
Fig 6.
As you can see there are quite a bit of options here. Let’s break down what is going on.
Target | The target object index or ID we want our camera to follow |
Speed | How quickly the camera will interpolate to its Target’s position |
Width | The width of our view |
Height | The height of our view |
Sensitivity | The sensitivity of our mouse/controller for looking and pitching the camera |
Viewport | The viewport we want the camera to be on |
Interpolation | The interpolation speed of our look and pitching of the camera |
MouseLock | Enabling the mouse to be locked to the center of the window |
LookAxisV | The direction of the vertical axis mouse/controller movement (for inverting controls) |
LookAxisH | The direction of the horizontal axis mouse/controller movement (for inverting controls) |
PitchRange | The range of the max/min pitch angle from 45° (between 0-90) |
If you look, there is some extra stuff in there but for the most part, it is pretty standard to the default camera the Game Maker Studio 2 provides. I do want to touch on the PitchRange variable, however. By default, the minimum pitch range for the camera is set to 45°. That means from a 45° angle the camera will only pitch up to a maximum of 67.5° and a minimum of 22.5°. The max this value can be set is 90°. By setting it to 90° allows the camera to look completely from the side view of the world to the overhead view.
Now, let’s set our view width to 1280 and view height to 720 as well as enabling mouse lock.
Fig 7.
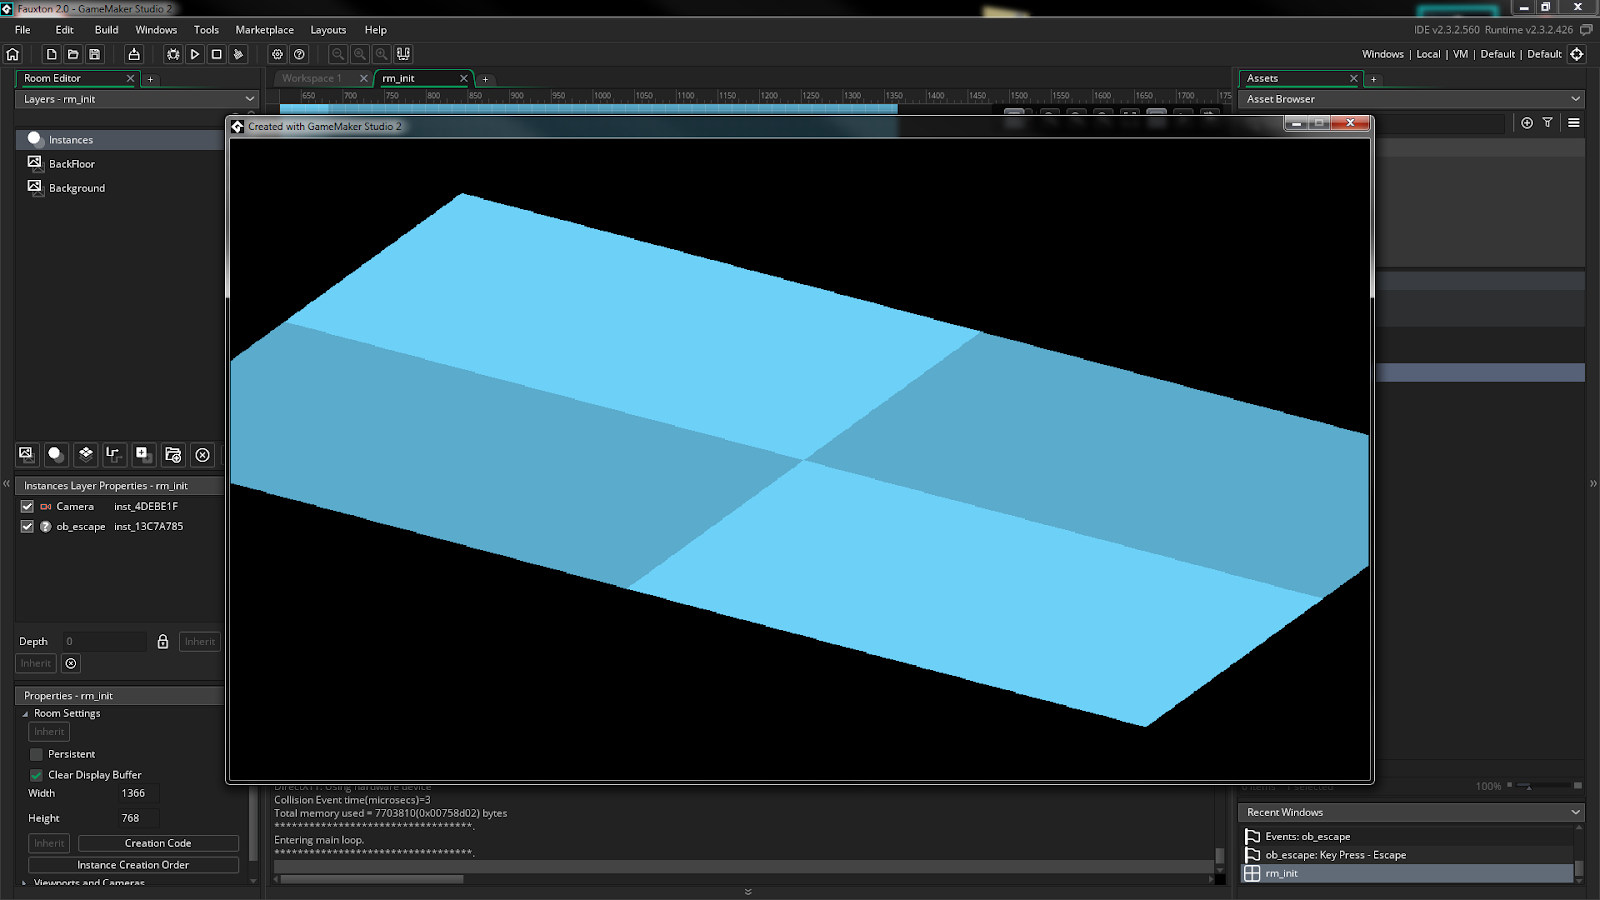
Now if we run the game you should see something like this:
Fig 8.
Creating & Updating models
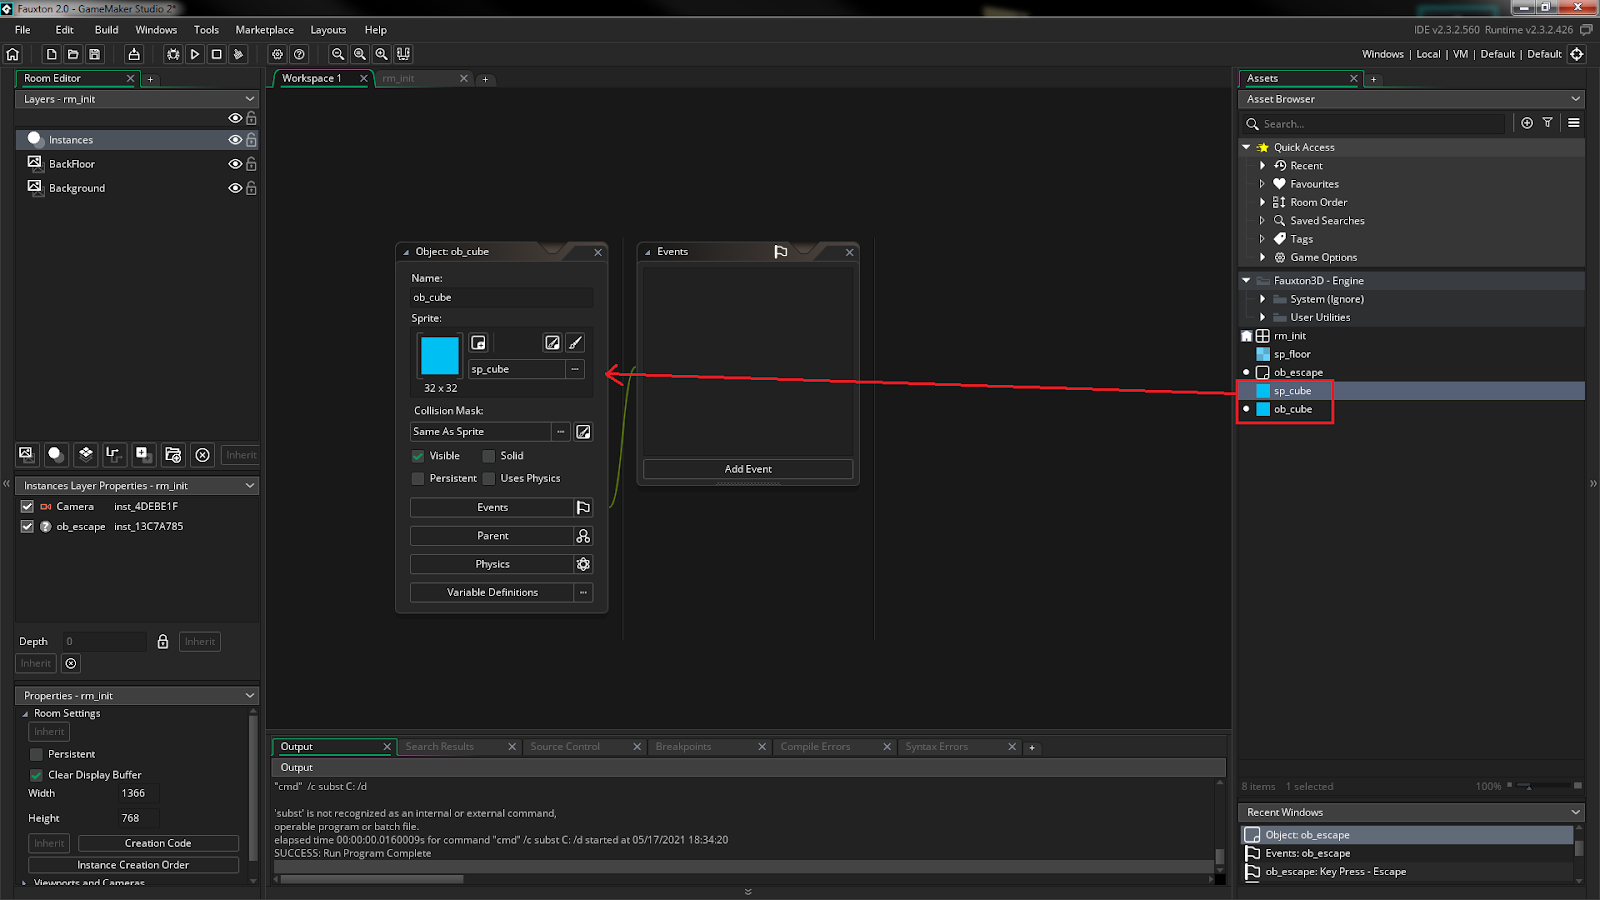
Now, let’s create a model. First, we need to create a new 32x32 pixel sprite with 32 sub-images:
Next, let’s create a new object called ob_cube and set its sprite index to our new sp_cube sprite.
Fig 9.
In the create event add this code:
model = fauxton_model_create(sprite_index, x, y, 0, 0, 0, 0, 1, 1, 1); |
Then turn ob_cube’s visibility off and add a couple to the room! Now you should see something like this:
Fig 10.
It’s that easy!! Now let’s make the objects move in circles! Add this to the step event of ob_cube
x += cos(current_time/250); y += sin(current_time/250); fauxton_model_set(model, x, y, 0, 0, 0, 0, 1, 1, 1); |
If you run the game now you should see the boxes moving in little circles! Isn’t that easy! Play around, see what happens!
*NOTE* Currently the engine will give strange results when you modify the x scale and y scale of a model that includes rotation. This will hopefully be fixed in future updates, but for now, it’s best to model sprites as you would want them to appear un-modified and only rotate around the z-axis.
3D Sprites
Now we have models but what about sprites? Well, this is made incredibly easy as well with the Sprite functions! For the most part, they work as you would expect, but now there is a SUPER easy way to make them face the camera at all times by just setting a face_camera parameter to true! As an example let’s create a character and move them!
First, let’s create a sprite and call it sp_player
Make sure to set the origin of the sprite to Bottom Centre.
Fig 11.

Now, let’s create a new object with our sprite set as the object’s sprite and call it ob_player. In the respective events add these:
Create Event
Camera.Target = id; |
Step Event
var _h = keyboard_check(ord("D")) - keyboard_check(ord("A")); var _v = keyboard_check(ord("S")) - keyboard_check(ord("W")); var _moving = point_distance(0, 0, _h, _v) > 0.5; var spd = 2; var fric = 0.3; if ( _moving ) { direction = point_direction(0, 0, _h, _v) + Camera.Forward; } speed = lerp(speed, _moving * spd, fric); |
Draw Event
draw_sprite_3d(sprite_index, image_index, x, y, 0, 0, 0, 0, 1, 1, 1, true); |
Now if you add the player to the room the camera will follow us AND the player will billboard perfectly to the camera!
*NOTE that the variable face_camera will override a sprites rotation and scale values so keep this in mind. If you want to rescale a sprites x scale, y scale, or rotation you should use the function fauxton_sprite_set and then draw your sprite using the regular draw_sprite functions. Make sure to ALWAYS set the x/y position of the draw_sprite function you are using to 0, 0 since the function fauxton_sprite_set will set the position of the sprite-based in the world, so you don’t need to with Game Maker Studio 2’s built-in draw_sprite x/y value.
Static Buffers & Shaders
Static buffers are INCREDIBLY powerful and massive performance boosters. They are perfect for things that you do not intend to alter much. In this example, we will create some grass and make it sway!
First, let’s import a simple 32x32 pixel grass patch sprite with 10 sub-images and call it sp_grass_patch :
Next, let’s create an object called ob_grass_create and add this to the create event:
fauxton_buffer_create("GrassBuffer"); grassPatch = fauxton_model_create( sp_grass_patch, 0, 0, 0, 0, 0, 0, 1, 1, 1); repeat(100) { var xx, yy, rot, scl; xx = random(room_width); yy = random(room_height); rot = random(360); scl = random_range(0.5, 1.5);
fauxton_model_set(grassPatch, xx, yy, 0, 0, 0, rot, scl, scl, scl); fauxton_model_add_static(grassPatch, "GrassBuffer"); } fauxton_model_destroy(grassPatch); |
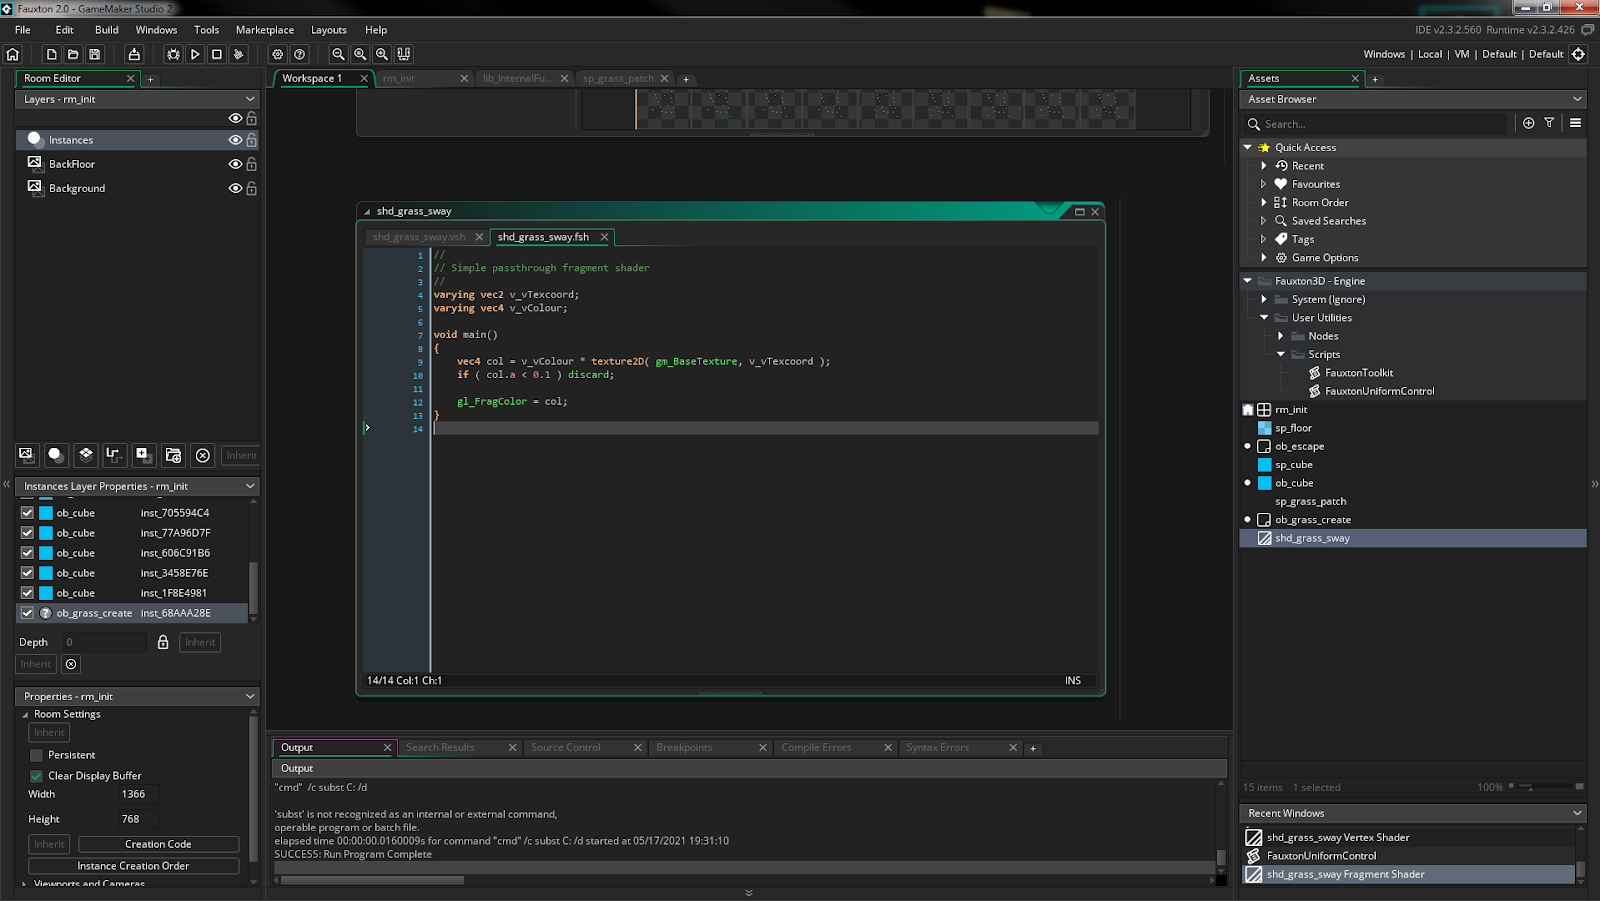
If you run the game now you will see a bunch of randomized grass! Not only is this insanely optimal for performance, but it is also perfect for something like grass, as we can also set custom shaders for buffers! Let’s create a new shader first and call it shd_grass_sway. In the vertex shader (shd_grass_sway.vsh) change the code to this:
// // Simple pass-through vertex shader // attribute vec3 in_Position; // (x,y,z) //attribute vec3 in_Normal; // (x,y,z) unused in this shader. attribute vec4 in_Colour; // (r,g,b,a) attribute vec2 in_TextureCoord; // (u,v) varying vec2 v_vTexcoord; varying vec4 v_vColour; uniform float time; void main() { vec4 object_space_pos = vec4( in_Position.x, in_Position.y, in_Position.z, 1.0);
vec4 oPos = object_space_pos; oPos.x += cos(time + oPos.x) * oPos.z * 0.1; oPos.y += sin(time + oPos.y) * oPos.z * 0.1; object_space_pos = oPos;
gl_Position = gm_Matrices[MATRIX_WORLD_VIEW_PROJECTION] * object_space_pos; v_vColour = in_Colour; v_vTexcoord = in_TextureCoord; } |
And then change the fragment shader to this:
// // Simple pass-through fragment shader // varying vec2 v_vTexcoord; varying vec4 v_vColour; void main() { vec4 col = v_vColour * texture2D( gm_BaseTexture, v_vTexcoord ); if ( col.a < 0.1 ) discard;
gl_FragColor = col; } |
Since we are using custom shaders, Game Makers default alpha blending is overridden by your shader, so we will need to add our own in the fragment shader!
Fig 12.a
Fig 12.b
In this shader, we have a uniform called time. We will use this to gradually make our grass sway. But how do we set this to the grass buffer? Easy! If we go back into ob_grass_create we can add a new parameter to the end of our fauxton_buffer_create function:
fauxton_buffer_create("GrassBuffer", shd_grass_sway); grassPatch = fauxton_model_create( sp_grass_patch, 0, 0, 0, 0, 0, 0, 1, 1, 1); repeat(100) { var xx, yy, rot, scl; xx = random(room_width); yy = random(room_height); rot = random(360); scl = random_range(0.5, 1.5);
fauxton_model_set(grassPatch, xx, yy, 0, 0, 0, rot, scl, scl, scl); fauxton_model_add_static(grassPatch, "GrassBuffer"); } fauxton_model_destroy(grassPatch); |
So you’re probably wondering how we edit the time uniform? This is where the special script called FauxtonUniformControl comes in! This script can be found in Fauxton3D - Engine > User Utilities > Scripts > FauxtonUniformControl. Add this code to the script underneath the case statement for shd_default.
case shd_grass_sway: var uni = shader_get_uniform(shd_grass_sway, "time"); shader_set_uniform_f(uni, current_time/250); break; |
Fig 13.
Now if you run the game (and look closely) you can see the grass swaying! It’s that easy!
Comments
Log in with itch.io to leave a comment.
cool